
Drove down to Rally Design today which is the nearest place to me (I think) that stocks performance brake fluid. Picked up 1.3 litres of Wilwood 570 so that I could have another go at bleeding the brakes. On the way back, I dropped into Dan Taylor of Taylor TVR to book the car in for a geometry check. This is necessary because I've changed pretty well every component of the suspension that would affect the geometry. So in I go and talk to Colin, who said they were taking bookings for June! I was staggered! I asked if there was anywhere else I could go to get it done, and he went off and got Dan. Dan asked how I was fixed for Saturday, and then for this afternoon. I said fine, OK, I just need to bleed the brakes and then I'd be back. I then asked him to write in his diary that this was work needed for the MOT so that I could legally drive without an MOT, and he said that coincidentally the MOT place he uses had no bookings that dayy because they'd can'd them all because of some new machine that would be fitted that day. As it happened, they'd had it fitted earlier in the week, and therefore they had a free day. So it was looking like I could get the geometry and the MOT done in one hit.
I shot off home and got the car back up in the air, and bled the brakes (again). They felt much better so then I drove off back to Taylor TVR. About two bends into the journey I had to get out of the car because it was trying to kill me. I realised on looking that the front end had the most toe out I'd ever seen on any car not involved in an RTA. Drove much more carefully to Taylor TVR, When I arrived there, we had the car on the lift, and then it was realised that I'd left the locking wheel nut key at home. Arse. Fortunately the MOT bloke had a tool that circumvents this, otherwise that would have severely tested my sense of humour. Midway sorting out the geometry the MOT guy turns up and takes the car away. Rings a little while later and gets Dan up to his unit. Turns out that the door button on the passenger side is not working and that fails the MOT. Car turns up at Dan's unit, Dan hops out, fixes it in about 10 mins, and back it goes. Shortly it reappears, and Dan finishes off the geometry. As part of the adjustment, periodically the car has to be let down off the ramp and driven back and forth a bit to settle the suspension. Even though the wheels lock up a bit on the smooth floor of the workshop, Dan says the brakes are still a bit spongy.
I pay up and bugger off. My drive home is good, apart from it's now 5.30pm, and there's lots of traffic about. So I have to move slowly (bad) and lots of people see how utterly filthy the car is (bad). Did a little bit of sticking my foot in it, which was great. The car was transformed from when I took it to Dan's (which it should be). It's been that long since I drove it that I don't know how much better it is now than before! Annoying, but overall it does feel very tight and stiff. The brakes seem pretty fierce in spite of what Dan said, however, I still have enough fluid, so I'll do one more bleeding session tomorrow. I guess that this is something I didn't really know before. You can bleed the brakes, drive it a bit, bleed again, and so on, and for a couple of goes, the brakes will get better.
Going to clean the car tomorrow, and then I'll take some more pics!
Thursday, 7 April 2011
Wednesday, 6 April 2011
Bleeding heck...
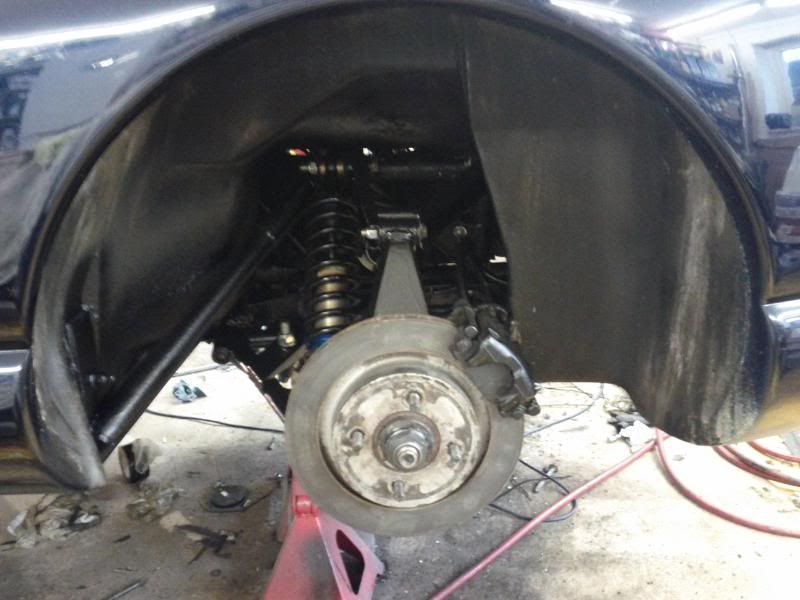
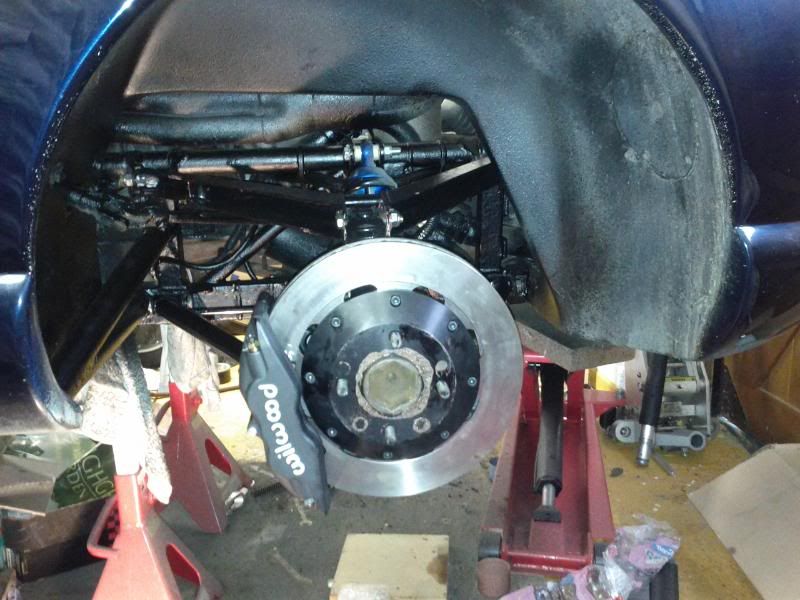
Got some other pics of the front brakes - weather was lovely today - too lovely to be stuck in the garage but I had work to do! Opened the garage doors at least which allowed some daylight in to get some better photos. Still using the phone, so the lens is still too small and crap to get decent shots, but better than before:
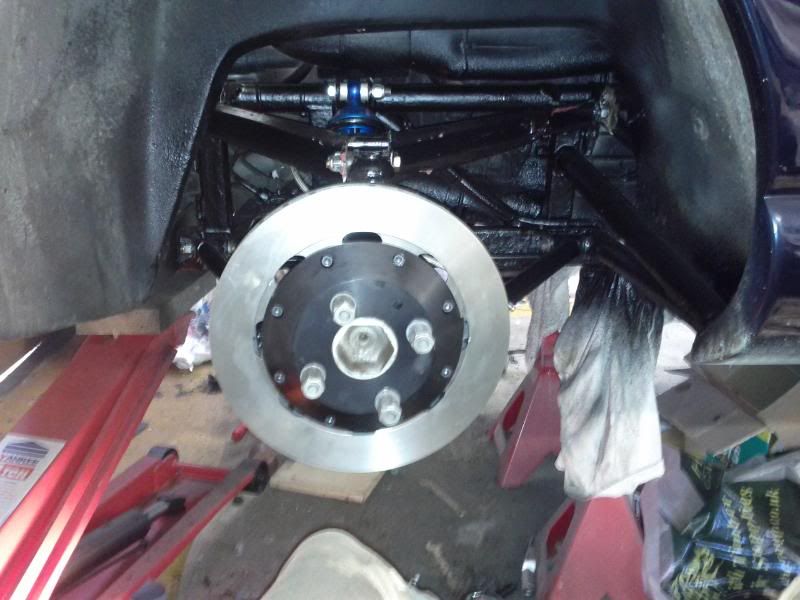
And from below (note the wheel is on!):
As you can see, it's still not as pretty as some out there, but there's paint on everything, and those brakes are nice and big!
I bled the brakes today using an Ezi Bleed. These gadgets are excellent value - I have an 80 quid job that attaches to my air compressor and this does at least as good a job. Having said that, I got through 1 litre of my favourite brake fluid, ATE Super Blue (also comes in gold, so you can alternate when you flush fluid and know when you've got rid of the old), and having got the car back down on its wheels for the first time in ages, I drove it out of the garage and realised that I'm going to need to bleed them again. Bugger. Pedal needs pumping up, no hardness there at all. Still, I'm at the stage where the MOT can be booked and I can look forward to driving it again!


And from below (note the wheel is on!):

As you can see, it's still not as pretty as some out there, but there's paint on everything, and those brakes are nice and big!
I bled the brakes today using an Ezi Bleed. These gadgets are excellent value - I have an 80 quid job that attaches to my air compressor and this does at least as good a job. Having said that, I got through 1 litre of my favourite brake fluid, ATE Super Blue (also comes in gold, so you can alternate when you flush fluid and know when you've got rid of the old), and having got the car back down on its wheels for the first time in ages, I drove it out of the garage and realised that I'm going to need to bleed them again. Bugger. Pedal needs pumping up, no hardness there at all. Still, I'm at the stage where the MOT can be booked and I can look forward to driving it again!
Tuesday, 5 April 2011
Steve Heath's nuts are too big.
This post is going to be long. I did think about splitting it into smaller posts, but then it's just the same length of stuff split up a bit - what's the point? Anyway, on with the saga.
Last time around, I had got the nearside rear wishbones on and had pretty well built up the suspension. I did the same to the other side, but with added frustration. In a previous post I wrote that one of the front lower wishbones had been deformed by the process of removing the bushes. On the offside rear upper wishbone, a similar thing had happened. The wishbone was now narrower than it had started out. I ended up making a 'tool' out of angle iron, bolting this too the wishbone and getting medieval with a vice. All this took lots of time, and it took about another half day to get the other side built up. While I was there, I realised that I had used the wrong bolts for the shocks on the near side, and ended up having to change those out too. Overall it's been a stinker. This has not been helped by the complete inaccessibility of some of the nuts and bolts in putting it all back together. I have used all new nuts and bolts, mostly supplied by Steve Heath, however, some I have had to supply myself as the space for the larger nuts that Steve supplies is too tight. All this fannying about costs mucho time (hasten to add - not Steve's fault - just TVR's design and the fact that they are all hand made, so each is somewhat different). Looks like this now:
Again, the all black colour scheme, coupled with me using my phone as a camera means that the photos don't come out that well, but you can see now that everything's connected up, braided brake lines fitted, handbrake cable on, drop links connected etc. Job done. On to the fronts.
As a reminder, this is where we left the front:
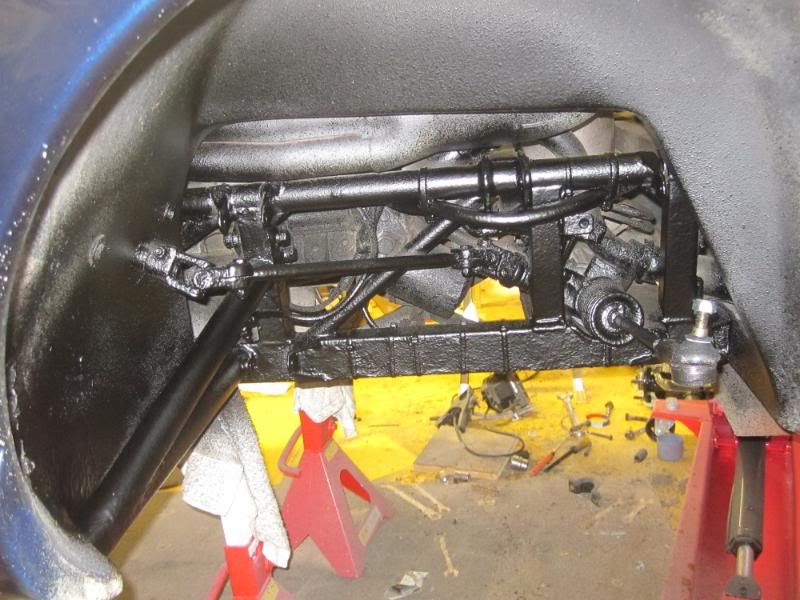
Just looks like a mass of black shutz, which it really is. First I got the wishbones in. This was much easier than the rears, but still not a task I'd want to do too often:

Then I built up the hub and put that in:
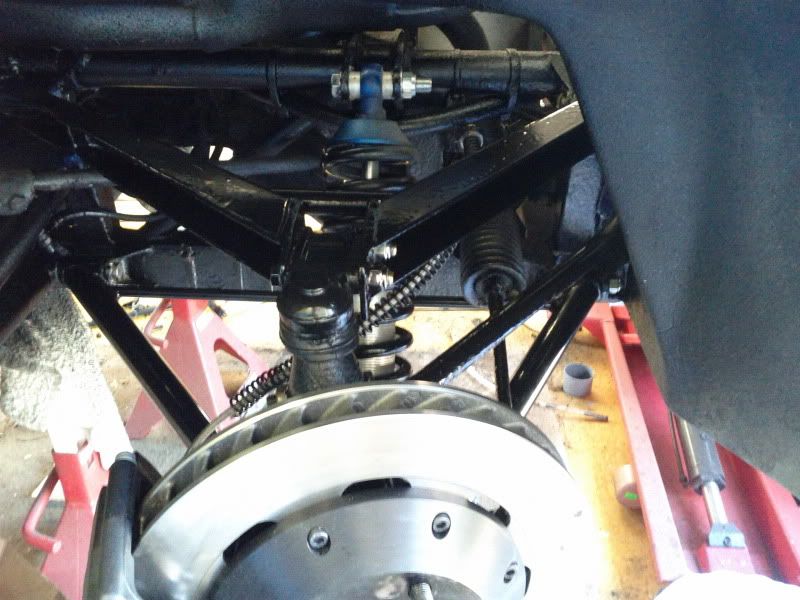
This was all very straigtforward at this point. Then I started on the brakes. Now you'll remember that way back in this blog, I mentioned that I'd bought stuff that was far more to do with the car's dynamics than the way it looked. Well, here you go. This is the brake kit that I have (I won't insult your intelligence by pointing out the new parts) next to the old front brakes:
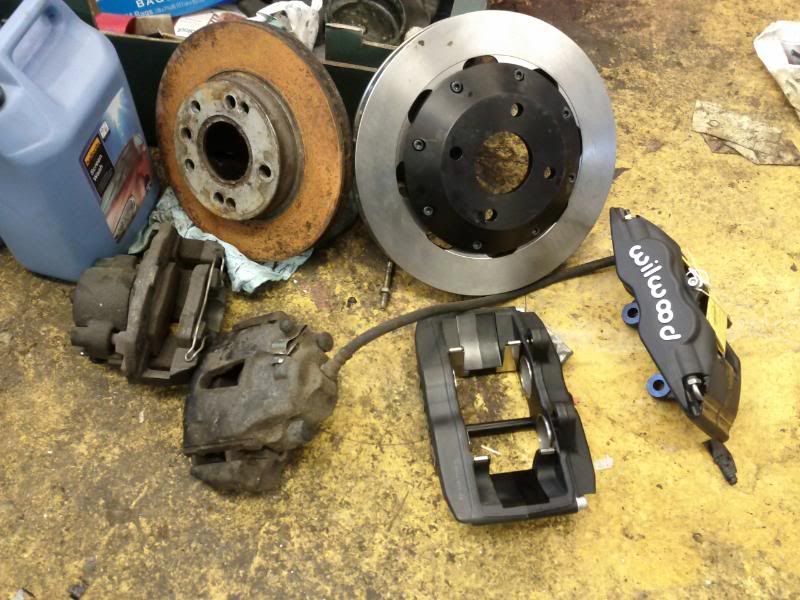
That should slow me down a tad. Makes the old kit look a bit effeminate really! Here's the disc on the hub (just temporarily before I tackled the other side and the calipers):
I then had a complete moment of muppetry. There's an adaptor that comes with the brake kit that converts NPT thread in the caliper to the more normal M10 of brake lines. I didn't at all twig this and this was the result:
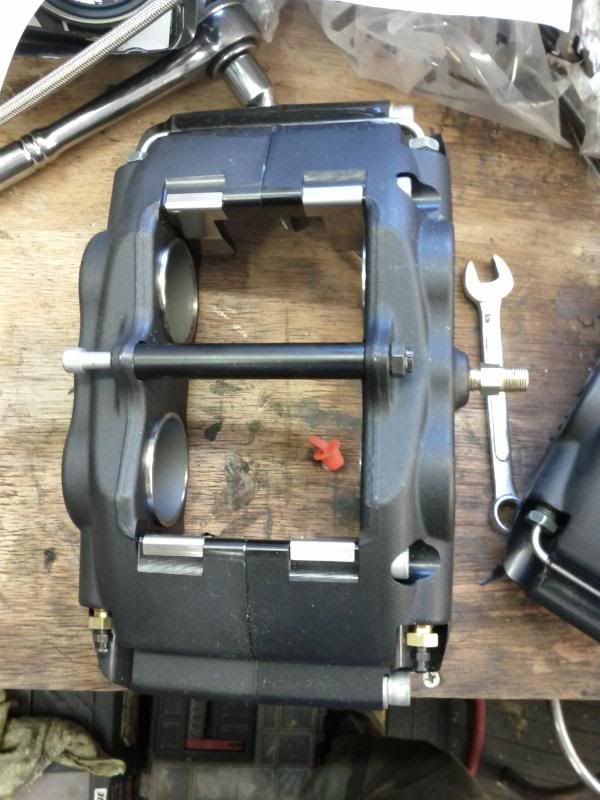
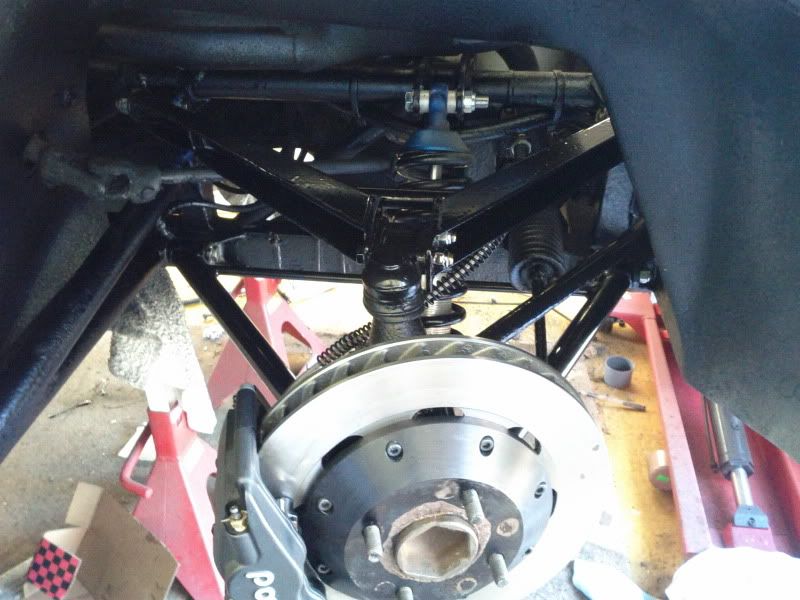
Duh. The NPT thread is sticking outwards. No wonder it didn't want to go into the caliper! Luckily I'm not that stupid that I just tried to wind it in - realised all was not well and stopped play. Today I rang Rally Design where I'd bought the kit and they pointed out what a knobber I was. Once we'd establised that, I was free to carry on building up the front end:

and the other side (for once):
Anti-roll bar is not on at this stage. That was a saga in itself. 4 bolts to get the bar fixed in. Took about 30 mins to wiggle and curse the bar into position ("HTF did it come out again?") and a further 1 hour for the bolts to do up. Plus say 25 mins to put the drop links back on. Talk about things taking much longer than you thought they would!
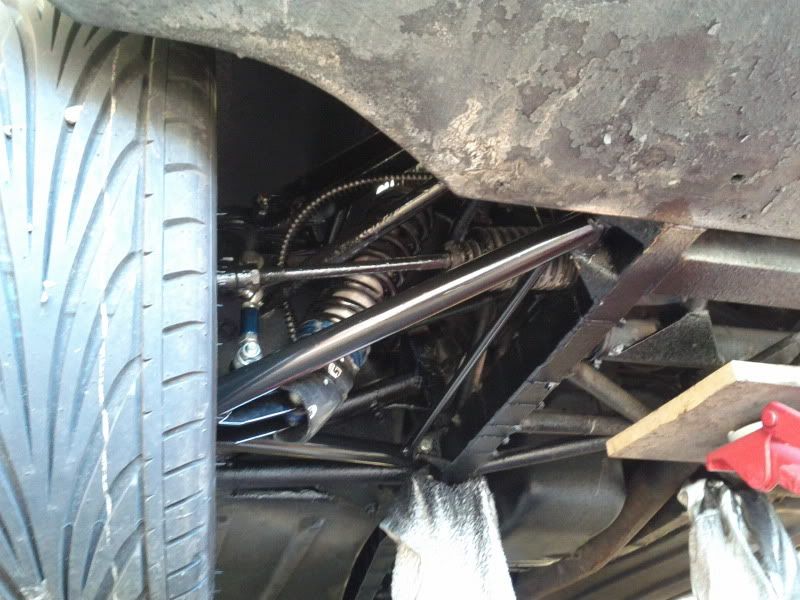
At this point, I touched up all the chips I'd made in the paintwork on the wishbones and then decided that the new shiny white outriggers looked really odd, and could also do with a bit more protection. One of the reasons why these car's outriggers rot is that crap finds its way on top of them and then they just rust down from above. I loaded up the Shutz gun again and let the outriggers have it, being careful to get the nozzle far up as high as possible and give the trigger a good squeeze. I think that a load of the black goop will have found its way up and down on top of the 'riggers slowing the process of decay down a great deal:
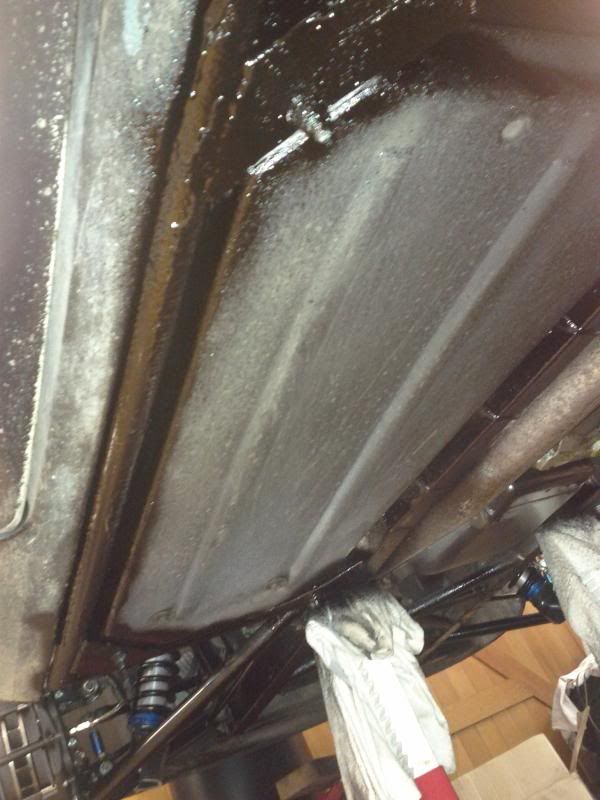
Incidentally, you can see the size of disc and calipers (width really) at the extreme bottom left corner. Now I just need to bleed the brakes and take it off to Dan Taylor for a geometry check.
I thought this post would be longer than it is really - goes to show that things are much easier said (written) than done - I am stiff as heck and my hands are stinging! The other thing to note is what it all looked like before. Looking at the floor in that post makes me realise how much crud is now on my garage floor. As soon as I get the car out, I will do something about that...
Anyway, quick chassis spec check:
TVR Chimaera 400.
Polybushed suspension
Tubular lower front wishbones
Gaz Gold Pro shocks/springs all round
Steve Heath ARB drop link kit
Poly ARB blocks
Braided brake hoses
Wilwood Dynalite 4 pot front calipers
Massive vented front discs (300mm dia x 32mm width)
Hawk Racing pads (fast road/track day compound)
Compomotive MO6 wheels F: 16x8, R 17x9
Toyo Proxes TR1S. F: 225/16/45, R 255/17/40
Last time around, I had got the nearside rear wishbones on and had pretty well built up the suspension. I did the same to the other side, but with added frustration. In a previous post I wrote that one of the front lower wishbones had been deformed by the process of removing the bushes. On the offside rear upper wishbone, a similar thing had happened. The wishbone was now narrower than it had started out. I ended up making a 'tool' out of angle iron, bolting this too the wishbone and getting medieval with a vice. All this took lots of time, and it took about another half day to get the other side built up. While I was there, I realised that I had used the wrong bolts for the shocks on the near side, and ended up having to change those out too. Overall it's been a stinker. This has not been helped by the complete inaccessibility of some of the nuts and bolts in putting it all back together. I have used all new nuts and bolts, mostly supplied by Steve Heath, however, some I have had to supply myself as the space for the larger nuts that Steve supplies is too tight. All this fannying about costs mucho time (hasten to add - not Steve's fault - just TVR's design and the fact that they are all hand made, so each is somewhat different). Looks like this now:

Again, the all black colour scheme, coupled with me using my phone as a camera means that the photos don't come out that well, but you can see now that everything's connected up, braided brake lines fitted, handbrake cable on, drop links connected etc. Job done. On to the fronts.
As a reminder, this is where we left the front:

Just looks like a mass of black shutz, which it really is. First I got the wishbones in. This was much easier than the rears, but still not a task I'd want to do too often:

Then I built up the hub and put that in:

This was all very straigtforward at this point. Then I started on the brakes. Now you'll remember that way back in this blog, I mentioned that I'd bought stuff that was far more to do with the car's dynamics than the way it looked. Well, here you go. This is the brake kit that I have (I won't insult your intelligence by pointing out the new parts) next to the old front brakes:

That should slow me down a tad. Makes the old kit look a bit effeminate really! Here's the disc on the hub (just temporarily before I tackled the other side and the calipers):

I then had a complete moment of muppetry. There's an adaptor that comes with the brake kit that converts NPT thread in the caliper to the more normal M10 of brake lines. I didn't at all twig this and this was the result:

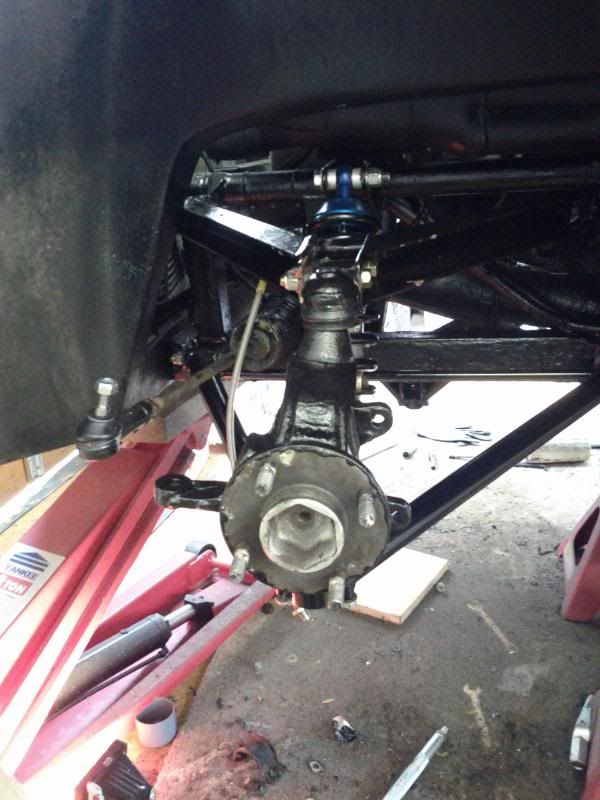
Duh. The NPT thread is sticking outwards. No wonder it didn't want to go into the caliper! Luckily I'm not that stupid that I just tried to wind it in - realised all was not well and stopped play. Today I rang Rally Design where I'd bought the kit and they pointed out what a knobber I was. Once we'd establised that, I was free to carry on building up the front end:

and the other side (for once):

Anti-roll bar is not on at this stage. That was a saga in itself. 4 bolts to get the bar fixed in. Took about 30 mins to wiggle and curse the bar into position ("HTF did it come out again?") and a further 1 hour for the bolts to do up. Plus say 25 mins to put the drop links back on. Talk about things taking much longer than you thought they would!
At this point, I touched up all the chips I'd made in the paintwork on the wishbones and then decided that the new shiny white outriggers looked really odd, and could also do with a bit more protection. One of the reasons why these car's outriggers rot is that crap finds its way on top of them and then they just rust down from above. I loaded up the Shutz gun again and let the outriggers have it, being careful to get the nozzle far up as high as possible and give the trigger a good squeeze. I think that a load of the black goop will have found its way up and down on top of the 'riggers slowing the process of decay down a great deal:

Incidentally, you can see the size of disc and calipers (width really) at the extreme bottom left corner. Now I just need to bleed the brakes and take it off to Dan Taylor for a geometry check.
I thought this post would be longer than it is really - goes to show that things are much easier said (written) than done - I am stiff as heck and my hands are stinging! The other thing to note is what it all looked like before. Looking at the floor in that post makes me realise how much crud is now on my garage floor. As soon as I get the car out, I will do something about that...
Anyway, quick chassis spec check:
TVR Chimaera 400.
Polybushed suspension
Tubular lower front wishbones
Gaz Gold Pro shocks/springs all round
Steve Heath ARB drop link kit
Poly ARB blocks
Braided brake hoses
Wilwood Dynalite 4 pot front calipers
Massive vented front discs (300mm dia x 32mm width)
Hawk Racing pads (fast road/track day compound)
Compomotive MO6 wheels F: 16x8, R 17x9
Toyo Proxes TR1S. F: 225/16/45, R 255/17/40
Subscribe to:
Comments (Atom)